
SHORT SUMMARY
- Follow the 5 step process to turn any blog post into a video using AI.
- See a real, hands on walkthrough of FlexClip converting a blog post into a finished video in under 5 minutes.
- Learn the 5 most common mistakes that make blog to video conversions underperform.
- Compare FlexClip vs CapCut and other tools to find the best fit for script to video conversion.
- Get the FlexClip discount code and pricing breakdown before you subscribe.
Why Turning Blog Posts Into Videos Works
Turning a blog post into a video is a simple way to get more value from content you’ve already created. Instead of writing something new, you can transform one article into a YouTube video, social media clip, tutorial, or short explainer and reach people who prefer watching over reading.
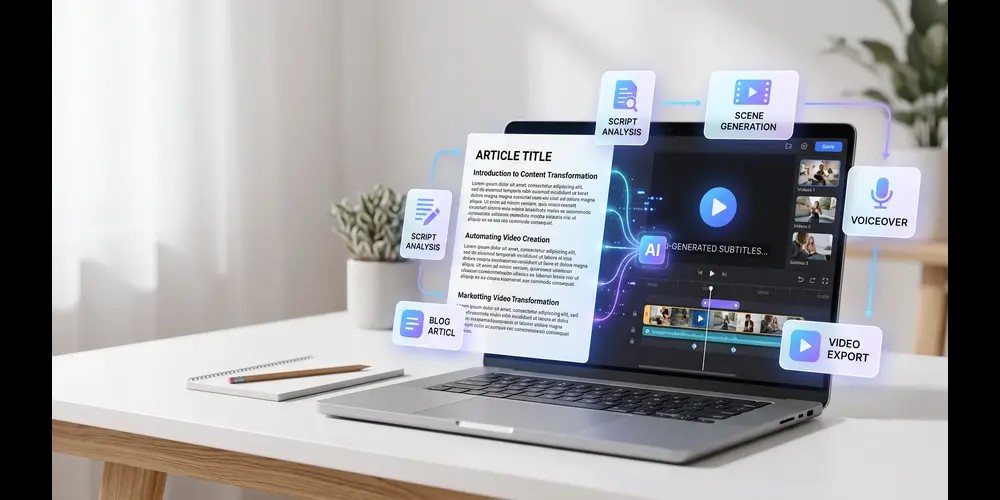
The process is also much faster with AI. Your blog already contains the research, ideas, and structure, so AI video tools can turn that information into a script, scenes, visuals, and a complete video draft. You can then make a few edits and adapt the video for different platforms.
In this guide, I’ll show you how to turn a blog post into a video using AI, including the 5 step process I followed and my hands-on experience using FlexClip to convert a real blog post into a video.
What You Need Before You Start
Turning a blog post into a video requires three things: a published blog post, an AI video tool, and a clear goal for where the video will publish. Skipping any of these three slows down the process later.
The blog post needs a clear structure with distinct sections, since AI tools convert headings and key points into scenes. Posts with vague or unstructured paragraphs produce weaker scripts. An AI video tool such as FlexClip handles the script extraction, visuals, and voiceover in one platform, removing the need for separate software.
The final goal matters before recording starts. A video built for YouTube runs longer and uses a horizontal frame, while a video built for TikTok or Reels runs under 60 seconds in a vertical frame. Deciding this early shapes how much of the blog post gets used in the script.
The 5 Step Process for Turning a Blog Post Into a Video
Turning a blog post into a video follows five steps: selecting the post, extracting a script, generating the video, optimizing it for the platform, and publishing it with tracking in place. Each step builds on the last, so skipping one weakens the final video.
Step 1: Pick the Right Blog Post
Choose a blog post that already ranks or performs well, since a strong post gives the video a proven topic. Posts with clear headings, short paragraphs, and a defined structure convert into scripts more easily than long, unstructured articles. How to guides, listicles, and comparison posts such as product reviews work especially well, since their structure already resembles a video outline.
Step 2: Turn the Post Into a Script
Extract the core points from each section and rewrite them as short, spoken sentences. A written blog post uses longer sentences built for reading, while a video script needs short, direct lines built for listening. Keep the script close to 150 words per minute of video, and remove statistics or details that only work in text form, such as footnotes or long URLs. AI tools such as FlexClip can automate this step directly from a blog URL, skipping manual rewriting entirely.
Step 3: Generate the Video
Paste the script into an AI video tool and let it match scenes to visuals automatically. Tools such as FlexClip pair each sentence with stock footage, add transitions, and can generate a voiceover automatically. This step turns a text script into a full video without manual scene building or filming.
Step 4: Optimize the Video for Each Platform
Resize and trim the video to match the platform it will publish on. YouTube favors horizontal 16:9 videos over 3 minutes long, while TikTok, Reels, and Shorts favor vertical 9:16 videos under 60 seconds. Add captions to every version, since most viewers watch social videos with sound off.
Step 5: Publish and Track Performance
Publish the video with a link back to the original blog post, then track watch time and click through rate. Watch time below 50 percent signals a weak hook in the first 3 seconds. Click through rate to the blog post shows whether the video successfully drives readers back to the full article.
The Best AI Tools for Blog to Video Conversion
FlexClip, Pictory, and InVideo rank among the strongest AI tools for converting blog posts into video in 2026. Each tool handles script extraction and scene generation differently, so the right choice depends on the type of content and the platform it’s built for.
FlexClip for Business and Marketing Content
FlexClip converts blog posts into videos through its AI text to video tool. Users can paste a script or blog URL, and FlexClip creates scenes, adds transitions, stock visuals, and voiceovers automatically. This makes it useful for business blogs, product explainers, and social media content. Its template library also includes formats for promotional videos, training content, and social media posts.
FlexClip’s free plan lets you test the video creation process, while the Plus and Business plans offer higher export quality and more AI credits. If you’re planning to upgrade, check our FlexClip coupon and discount page for the latest available offer before subscribing.
Other Tools Worth Comparing
Pictory and InVideo offer similar blog to video conversion but focus on different use cases. Pictory works well for long form YouTube summaries, since it pulls full articles from a URL and builds longer, narrated videos. InVideo focuses more on social clips, with templates built for TikTok and Instagram Reels.
Creators comparing these options against a timeline based editor should also weigh CapCut, which handles manual editing well but does not include a script to video generator.
See It In Action: Turning a Blog Post Into a Video With FlexClip
This walkthrough uses FlexClip’s Blog URL to Video tool on the FlexClip vs CapCut comparison already published on this site. This post already ranks for its target keyword, making it a strong candidate under Step 1’s criteria. Pasting the article URL is the only input step required, with no manual script writing.
Paste the Blog URL
FlexClip takes a blog URL directly and analyzes the full article in seconds, with no copying or pasting of text required.

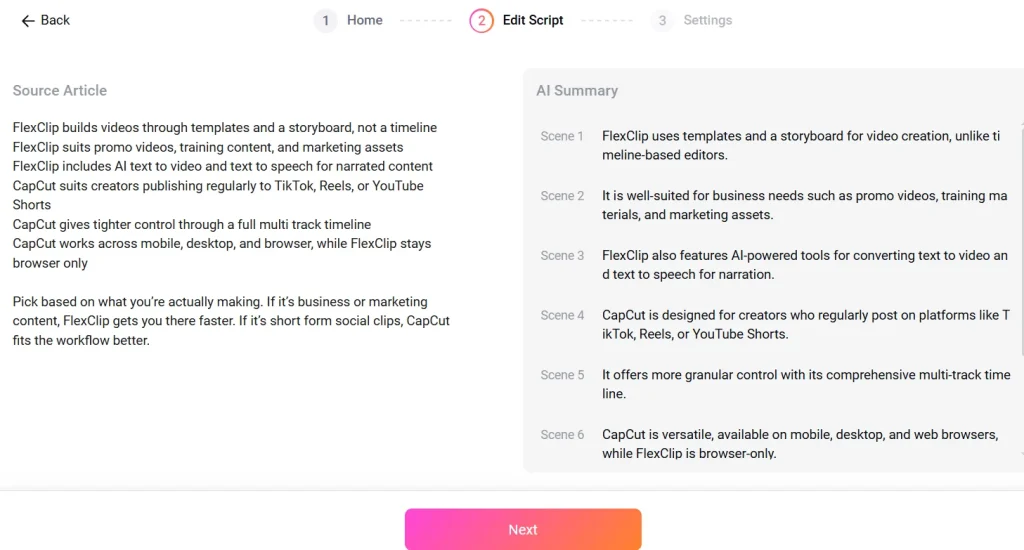
Review the AI Generated Script
FlexClip pulled the article and built an 8 scene script within a minute. Each scene matches a key point from the post, covering FlexClip’s template workflow, CapCut’s timeline, and the pricing differences. The source text stays visible on screen for reference.
Get a Finished Timeline With Footage and Captions
FlexClip assigned stock footage and captions to each scene automatically and placed them on a timeline. The draft matched the article’s structure scene for scene, with captions burned in and clips trimmed to fit each line.
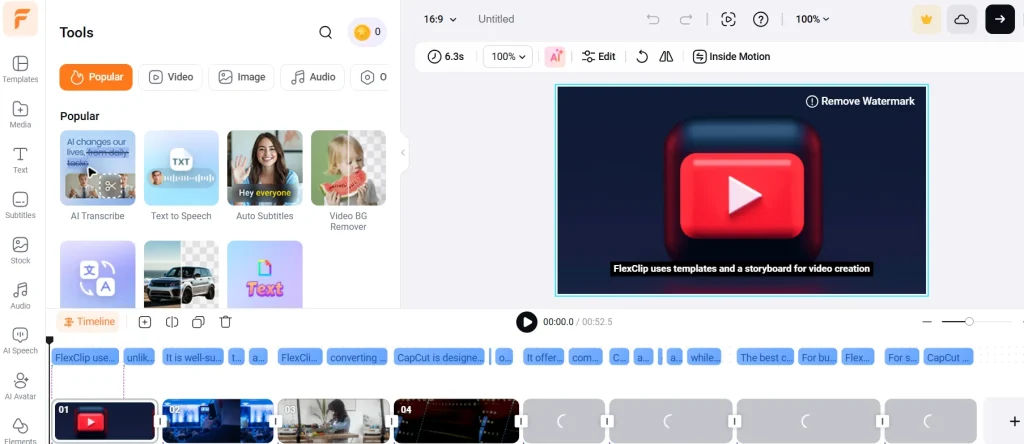
The full process, from pasting the URL to a finished draft, took under 5 minutes.
A Real Example: Blog Post to Video Results
Beyond the walkthrough above, here’s an illustrative example of how a blog to video conversion can perform once published. These figures aren’t tracked results, they show a realistic outcome based on typical watch time and click through patterns for this kind of content.
A 1,200 word how to guide converted into a 90 second video could generate meaningfully higher engagement than the blog post alone, especially if it reaches viewers on YouTube Shorts and Instagram Reels who never saw the original post.
Watch time typically holds strongest in the first 15 seconds if the hook is strong, then drops steadily through later scenes, similar to how readers skim toward the end of a written post. Click through rate back to the blog post depends heavily on including a direct link in the caption and a clear call to action in the final scene.
Common Mistakes to Avoid
The most common blog to video mistakes involve the script, the visuals, the opening, the links, and the choice of post. Avoiding these five keeps a converted video from underperforming the blog post it came from.
Converting the Entire Post Word for Word
A blog post written for reading does not work as a spoken script. Long sentences, footnotes, and detailed statistics slow down a video and lose viewer attention within seconds. Cut the post down to its core points and rewrite each one as a short, spoken line instead of reading the article aloud.
Relying Only on Stock Footage
Generic stock footage makes a video forgettable. Viewers scroll past clips that look identical to hundreds of other videos in their feed. Mix stock footage with text overlays, on screen data, or a talking presenter to keep the video visually distinct from competitors covering the same topic.
Skipping the Hook
A video without a strong opening loses most viewers within the first 3 seconds. The blog post’s introduction rarely works as a video hook, since written introductions build up slowly while video hooks need to state the payoff immediately. Open with the single most useful point from the post, then explain the rest afterward.
Forgetting to Link Back to the Original Post
A video with no link back to the blog post wastes its traffic potential. Add the blog post’s URL in the video description, and include a spoken call to action near the end directing viewers to read the full article. This turns video views into blog traffic instead of a standalone view count.
Converting Low Performing Posts
Converting a blog post that already struggles to attract readers rarely produces a strong video. A post with weak search rankings or low engagement usually signals a weak topic, not just a text format problem. Select posts that already rank well or get regular traffic before spending time on a video version.
FlexClip vs CapCut for Blog to Video Projects
FlexClip fits blog to video projects better than CapCut, since it converts scripts into scenes automatically instead of requiring manual timeline editing. CapCut’s multi track timeline gives precise control over transitions and effects. It has no script to video generator, though, so every blog post still needs manual scene building before editing even starts.
FlexClip removes that extra step. Paste a script or blog URL, and FlexClip matches each sentence to stock footage, adds transitions, and generates a voiceover automatically. This turns a written blog post into a finished video without filming or manually building scenes one by one.
CapCut still works well once footage already exists, particularly for creators repurposing blog content into fast, trend driven TikTok or Reels clips. But for the core task of converting written text into video, FlexClip handles more of the work automatically.
A full feature and pricing breakdown between the two platforms is available in this FlexClip vs CapCut comparison.
The Bottom Line
A good blog to video conversion keeps the script short, hooks viewers in the first 3 seconds, and links back to the original post. Follow the five step process, pick a post that already performs well, and reuse it across YouTube, TikTok, and Instagram.
The tool matters too. A script to video generator like FlexClip builds scenes automatically, unlike a timeline only editor such as CapCut. Paste in a blog post, and the script, scenes, and voiceover come out together.
Start with the free plan, then use code FLEXCLIP10 for 10 percent off Plus or Business.